 10+ Years Experiences
 Same-Day Service Available
Expert Solutions for Appliance Vibration Problems | 2025
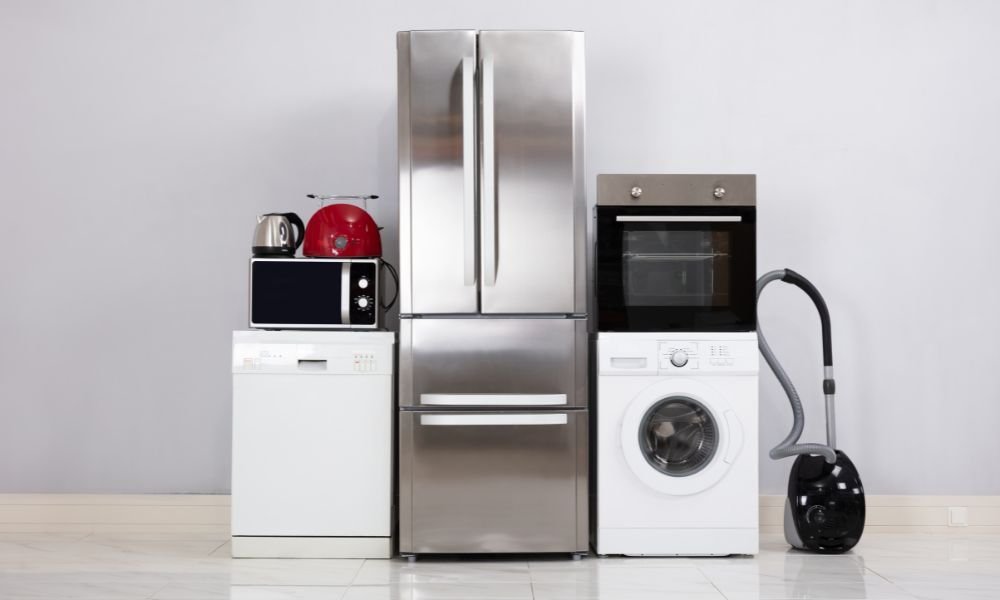
Understanding and Fixing the Appliance Vibration Problems in 2025 In many homes across Victoria BC, a common but often overlooked issue is appliance vibration. That thumping washer, buzzing fridge, or shaking dryer isn’t just irritating it could be a sign of deeper trouble. Whether you live in a modern apartment or an older home with sloped flooring, appliance vibration problems can lead to noise, damage, and higher energy use. In this expert guide by Quick Fix Appliance Experts, we’ll break down the most common reasons your appliances vibrate, what you can do about it, and how to prevent it in the future all in a practical, human tone you’ll actually enjoy reading. What Causes Your Appliances to Vibrate? Appliances are designed to run smoothly, but certain conditions can throw them off balance literally. 1. Unbalanced Loads in Washers or Dryers When heavy items are clumped to one side, especially during spin cycles, your washer or dryer starts shaking. Smart Tip: Load your laundry evenly. Mix towels with lighter clothes to keep the drum balanced. 2. Uneven or Sloping Floors Older Victoria homes often have floors that have settled or sloped over time, causing appliances to stand unevenly. Fix: Use a bubble level to check appliance balance. Adjustable legs or rubber feet can make a world of difference. 3. Worn Shock Absorbers (Washers) Shock absorbers inside front-loading washing machines reduce movement. If they wear out, vibrations increase. What to Do: Replace with high-quality OEM parts. It’s a repair that pays off immediately. 4. Loose or Damaged Internal Parts Motors, fans, or pulleys that come loose can create abnormal movement in almost any home appliance. Solution: Call a pro to inspect and tighten or replace faulty components. It’s better than letting parts shake themselves into full failure. 5. Compressor or Motor Vibrations (Fridges & HVAC) When your fridge buzzes or your HVAC unit shakes, it’s often due to misalignment or a compressor wearing out. Pro Fix: Ensure secure mounting and have the motor professionally serviced. Breakdown by Appliance Type Dishwashers Vibration Symptoms: Rattling sounds during cycles Fixes: Tighten mounting brackets and ensure it’s leveled on all sides Dryers Vibration Symptoms: Clunky sounds, moving unit Fixes: Inspect drum rollers, belts, or worn out bearings Refrigerators Vibration Symptoms: Humming or vibrating noises Fixes: Level the unit, inspect compressor mount, clean underneath Washing Machines Vibration Symptoms: Loud during spin, shaking violently Fixes: Check load balance, level the machine, install anti vibration pads Why Appliance Vibration Problems Shouldn’t Be Ignored May damage floors and countertops Can loosen internal parts over time Increases wear and tear (shortening appliance lifespan) Often signals bigger problems waiting to happen Tip: Early fixes are cheaper and safer than waiting until a complete breakdown. Smart Tools to Solve Vibration Problems In 2025, fixing vibration is smarter than ever: Anti Vibration Pads: Easy to install and extremely effective Digital Level Apps: Turn your phone into a leveling tool Smart Alerts: Some modern appliances notify you when excess movement is detected. Victoria BC Homeowners: Special Considerations Appliance vibration issues are more common in older homes and Victoria has plenty of beautiful but aged structures. Sloping floors, high humidity, and compact laundry rooms often make the problem worse. Solution: Regular inspections and properly adjusted supports are key. For reliable local service, trust Quick Fix Appliance Experts we understand local housing quirks. Appliance Upgrades That Help If your appliance is over 10 years old and keeps shaking despite repairs, it might be time to upgrade. Modern machines: Have better shock absorption Use smart load balancing Detect and self correct vibrations The Hidden Impact of Appliance Vibration Problems on Your Home While a shaking appliance might seem like a minor annoyance, appliance vibration problems can silently cause damage over time. Continuous vibration may loosen internal components, wear down screws and brackets, or even lead to leaks in appliances like washers and dishwashers. Over weeks or months, you might begin to notice your appliance working less efficiently, making more noise, or even damaging the surface it’s sitting on. For example, a vibrating washing machine can slowly scrape hardwood or laminate flooring, while a misaligned fridge may transfer vibrations through cabinets or countertops. For expert-backed solutions on handling appliance vibration problems, check out this helpful guide by TCL on fixing a shaking or vibrating washing machine here. Homeowners in Victoria BC, especially those in older homes with wooden floors, need to be extra mindful of these small movements that can have costly consequences if ignored. Taking early action saves not only your appliance but your entire setup. Final Thoughts: Appliance Vibration Problems If you’re tired of dealing with noisy, shaking appliances, you’re not alone and you’re not stuck. Most appliance vibration problems are caused by simple issues like unbalanced loads or poor installation. Fixing them can save you time, money, and peace of mind.Read our voltage protection tips to avoid electric related appliance performance issues. Whether you handle it yourself or call in the pros, getting to the root of the Appliance Vibration Problems keeps your home running smoothly. For expert appliance repair in Victoria BC, reach out to Quick Fix Appliance Experts. FAQs About Appliance Vibration Problems Q1. Why does my washer shake during the spin cycle? It’s usually due to unbalanced loads or worn shock absorbers. Always distribute laundry evenly. Q2. Are vibration pads worth it? Yes! They reduce movement, noise, and extend the life of your machine. Q3. Can a vibrating appliance be dangerous? Excessive vibration can cause internal damage, floor scuffs, and even pose fire risks if wires loosen. Q4. How do I know if my appliance is level? Use a spirit level or smartphone app. Uneven feet are a leading cause of vibrations. Q5. Should I repair or replace my vibrating appliance?
Troubleshoot Oven Preheating Problem Like a Pro | 2025 Guide

In the fast paced homes of Victoria BC, waiting endlessly for your oven to preheat can be incredibly frustrating especially when you’re eager to bake that perfect batch of cookies or roast dinner for the family. But don’t worry this guide uncovers the real reasons behind the oven preheating problem, and offers smart fixes to restore your oven’s performance efficiently. Whether you own a gas or electric model, this guide by Quick Fix Appliance Experts covers the causes, solutions, and maintenance tips to keep your oven working at optimal speed. Common Reasons Why Your Oven Preheats Slowly 1. Faulty Heating Element The bake element (bottom) or broil element (top) might be damaged. If it doesn’t glow red or heat evenly, it’s likely the reason your oven preheating problem is happening. Fix: Replace the faulty heating element an easy and affordable repair that makes a big difference. 2. Door Seal Leaks A worn or broken oven door gasket allows heat to escape, which forces the oven to work harder and longer to reach the set temperature. Fix: Inspect the seal for tears or gaps and replace it if needed. 3. Broken Temperature Sensor Your oven’s temperature sensor tells the appliance when to cycle the heat. If it’s faulty or out of place, it can misread the internal temperature and delay preheating. Fix: Reposition or replace the sensor after testing it with a multimeter to solve the oven preheating problem quickly. 4. Power Supply Issues A 240V electric oven that’s only receiving 120V due to wiring problems will struggle to heat up. This is more common than you’d think in older homes around Victoria BC. Fix: Have an electrician inspect and correct the power flow. 5. Obstructed Vents If your oven’s vents are clogged or blocked especially in built in units the trapped air slows down the heating cycle. Fix: Clean vents regularly and ensure airflow isn’t restricted. 6. Dirty or Greasy Interior A layer of grease or food debris can absorb heat instead of reflecting it toward your food, reducing efficiency and triggering an oven preheating problem. Fix: Use a non abrasive oven cleaner to clean the interior monthly. 7. Preheating While Overloaded Adding trays or heavy cookware before preheating is complete can absorb heat and delay the process. Fix: Let the oven reach full temperature before placing anything inside. Smart Fixes & Modern Solutions Modern problems need smarter fixes. Here are ways to speed up oven preheating in 2025 and beyond: Use the convection setting: It circulates hot air and preheats faster. Keep the door closed: Opening it delays heating by 25°F or more. Replace the control board: If delays persist, your oven’s brain may need an upgrade. Install a smart oven thermometer: Get accurate temperature readings for better timing. These can help eliminate the oven preheating problem from your daily routine. Pro Tips for Faster Oven Heating Keep the oven clean and the door tightly shut. Only use high quality cookware glass and dark pans heat faster. Preheat just before you’re ready to cook not long before. Still dealing with an oven preheating problem? Check out this expert troubleshooting guide by Mr. Appliance on why your oven isn’t heating properly. When Your Oven’s Age Becomes a Factor Appliance aging is a significant yet often ignored contributor to slow oven performance. Ovens that are over 8 10 years old may begin to lose efficiency not because of one failing part, but because of gradual wear across multiple systems. Heating elements, thermostats, insulation, and control boards can all weaken over time. If your oven is old and you’ve already replaced one or two components without much improvement, it may be worth considering a full inspection or even an upgrade. Today’s smart ovens come with rapid preheat modes, energy saving features, and diagnostics that detect issues before they cause delays. If you live in a busy household where cooking happens daily, investing in a newer, energy efficient model may actually save time and energy in the long run while solving your persistent oven preheating problem once and for all. Understanding the Role of Oven Insulation in Preheating Speed Many homeowners overlook the importance of oven insulation when diagnosing slow preheating issues. Modern ovens rely heavily on high quality insulation to trap and circulate heat efficiently. If that insulation begins to degrade due to age, moisture, or physical damage your oven will struggle to retain heat, making preheating a much longer process. You might notice the oven light stays on longer than usual or that the outside of your oven gets unusually warm both are signs of heat escaping. Replacing internal insulation isn’t always a simple DIY task, but if your oven is more than 10 years old and preheats slowly despite a working element, poor insulation may be to blame. In cities like Victoria BC, where homes often experience a wide range of temperatures, strong insulation is essential to keep your oven running efficiently all year round and prevent recurring oven preheating problems. Final Thoughts If you’re constantly wondering why your oven preheats so slowly, you’re not alone. At Quick Fix Appliance Experts in Victoria BC, we’ve helped countless homeowners speed up their cooking time with simple yet powerful repairs. Don’t let slow heating ruin your meals know the signs, address the oven preheating problem, and follow these smart solutions to get your oven back on track.For more tips on how electrical issues might contribute to an oven preheating problem, explore our Voltage Effect on Appliances guide. FAQs Q1. How long should it take an oven to preheat? A standard electric oven should reach 350°F in about 10–15 minutes. Anything beyond 20 minutes may indicate an oven preheating problem. Q2. Is it safe to use an oven that takes too long to heat? It’s generally safe but inefficient. Delayed preheating could waste energy and affect food quality. Q3. Can I fix slow preheating myself? Yes. Common DIY fixes include replacing heating elements, adjusting sensors, or cleaning the oven. Q4. Should I always preheat my oven before cooking? Yes. Preheating ensures even cooking and
Fix Washing Machine Leaking Issues | Expert Guide 2025
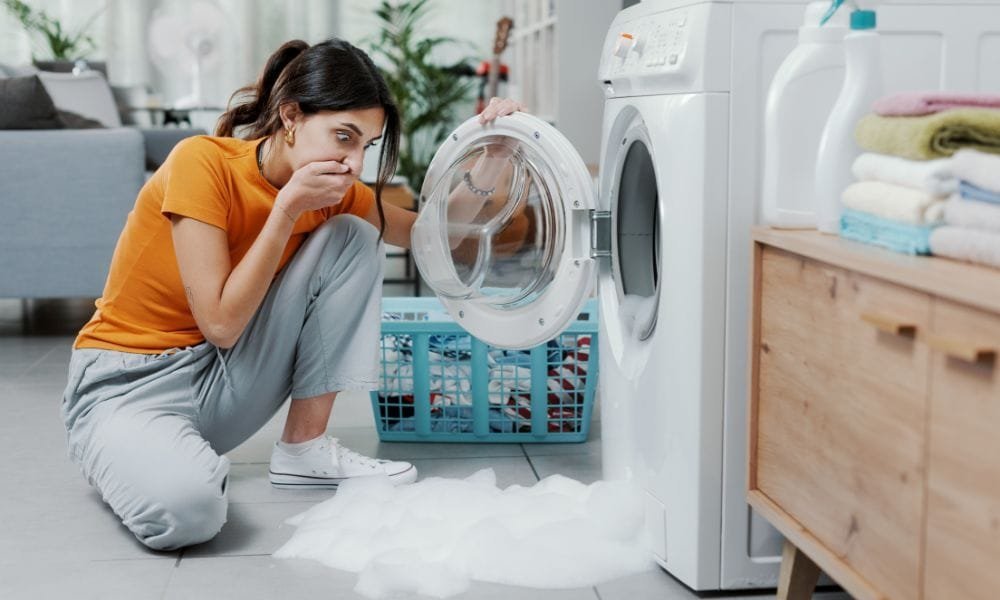
Washing Machine Leaking: Complete Fix & Prevention Guide A Washing Machine Leaking is every home owner’s worst nightmare. Not only does it make a mess, but if not dealt with, it can ruin floors, walls, and even your appliance’s internal components. Whether it’s a drippy drip or a full scale flood, finding and repairing the leak early is the way to save yourself from costly fixes.If you’ve noticed your washing machine leaking unexpectedly, it’s time to investigate the root cause before it leads to serious damage. Here, you’ll learn the most common reasons why your washing machine is leaking, how to identify where it’s coming from, and what effective steps you can do to repair it.This 2025 edition features the newest methods, equipment, and professional insights in-step with current washing machines. Common Causes of Washing Machine Leaks 1. Damaged or Loose Hoses One of the primary causes behind washing machine leaks is often a damaged or worn out hose. Make sure to examine all hoses carefully. Drain hose: Could be cracked, blocked, or loose. Water inlet hoses: Can loosen or become brittle with age. Check for water at the back of the machine and inspect hose connections closely. 2. Rotten Door Seal (Front Loaders) Front load washing machines use a rubber gasket around the door to create a tight seal and prevent water from escaping. This seal can develop cracks, warp, or become clogged over time, resulting in leaks on the door. 3. Clogged or Faulty Drain Pump The drain pump that drains water during the spin cycle gets clogged with trash or sometimes even mechanically fails, resulting in water accumulating below the machine. 4. Overloading the Washer Overloading your washer past its rated capacity can upset its balance, spilling water or pushing it out through seals and hoses. 5. Misuse of Detergent HE washers require HE detergent. Regular soap produces too much sudsing that fills the drum and leaks out from numerous openings. 6. Internal Tub Damage The internal tub contains the water during washing. If the gasket is damaged or misaligned, it can allow water to escape mid cycle Step by Step Guide to Diagnosing a Leak Unplug the machine for safety. Look closely at the hoses for any signs of wear, cracks, or loosened connections. Examine the door seal carefully for tears, warping, or any other damage that might cause leaks. Look underneath for signs of water puddles near the pump area. Open the back panel (if comfortable doing so) to inspect internal tubing. Run a small test load to try and pinpoint when and where the leak begins. DIY Fixes for Common Washing Machine Leaks Fix 1: Replacing a Broken Hose Turn off water supply. Pull out the old hose with pliers. Connect a new hose and tighten securely. Test with water turned on. Fix 2: Cleaning or Replacing Door Seal Clean the gasket. Look for hidden items lodged in the seal. If damaged, take out the old seal and put on a replacement. Fix 3: Clean the Drain Pump Open the pump filter door. Clear debris. Re lock filter and perform rinse cycle. When to Call a Professional All leaks may not be simple to repair. Call a professional if: Water is leaking from within the washer drum. The control panel or electronics are damp. You’ve attempted to fix it yourself, but it still doesn’t work. Experts possess diagnostic equipment and replacement components that are frequently difficult for homeowners to find. If you’re in Victoria BC, you can trust QuickFix Appliance Experts to provide same day diagnosis and trustworthy washing machine repairs. How to Avoid Future Leaks Don’t overload the washer. Use proper detergent and suggested amount. Wipe the door seal once a week. Set up annual servicing. Monitor hose condition every few months. Disguised Signs You May Be Overlooking Hidden Signs You Might Be Ignoring A Washing Machine Leaking issue isn’t always as clear cut as a puddle on the floor. You may see wet clothes even after the last spin, a musty odor close to the appliance, or soggy, buckled flooring beneath your washer. Such subtle clues usually indicate slow leaks that have built up over time. Disregarding them can result in extensive water damage and expensive repairs. That’s why it’s crucial to probe even the tiniest indications before they snowball into larger issues. Effect of a Leaking Washing Machine on Your House A Washing Machine Leaking may appear to be a trivial problem, but it can quietly cause havoc in your home over time. Water leakage can rot floors, compromise structural stability, and even encourage the growth of mold behind walls or beneath tiles. What may begin as a few droplets may amount to hundreds of dollars in repairs if neglected in the long run. It is therefore imperative for homeowners to know the cause and respond quickly to make repairs. Final Thoughts Washing Machine Leaking A Washing Machine Leaking may look like just a puddle, but chances are it’s a warning sign for more serious problems that can become bigger, more expensive issues if left unchecked. The good news: most leaks are avoidable with some TLC and basic know how. For a deeper dive into the causes and fixes for a washing machine leaking, check out this comprehensive guide by The Spruce here. So, whether it’s an easy DIY hose replacement or a professional repair, dealing with your Washing Machine Leaking issue early is the best call. FAQ: Washing Machine Leaking Q1. Why is my Washing Machine Leaking from underneath? It usually indicates a bad drain pump, cracked tub, or loose internal hose. Q2. Can I use my washer if it’s leaking? It’s not recommended. Running it further may aggravate the damage or even cause electrical risks. Q3. How often should I replace my washer hoses? 5 years is the time frame we recommend even sooner if you see cracks or bulging. Q4. What detergent should I use? Always employ HE (high efficiency) detergent with front loading or HE designated
Voltage Effect on Appliances: Ultimate Protection Tips 2025

Understanding the Voltage Effect on Appliances: Expert Tips for 2025 In today’s smart home and high efficiency electronics age, your appliances have never been more networked and exposed. One of the unseen threats that can silently destroy your devices is voltage fluctuation. Whether it’s a brief power surge, dip, or persistent instability, the voltage effect on appliances can be both harmful and expensive. In this guide, we’ll explore exactly how voltage affects your appliances, signs of electrical trouble, ways to prevent damage, and the best protection strategies in 2025. Whether you’re a homeowner or a renter, protecting your investments starts with knowledge. What is Voltage, and Why Does It Matter? Voltage is the pressure that drives electrical current around circuits. It’s expressed in volts (V). Typical voltage at home is typically 110–120V (North America) or 220–240V (Europe, Asia). High or low voltage can make your appliances act strangely or even malfunction. At this point, the voltage effect on appliances comes into play. There are three kinds of voltage problems: Surge (High Voltage Spike): Occurs during storms or power grid mistakes. Sags or Dips (Low Voltage): Due to excessive load on the grid. Fluctuations: Periodic instability in voltage over time. The Impact of Voltage on Various Home Appliances Let’s discuss the voltage effect on appliances in different common household devices: 1. Refrigerators Refrigerators rely on stable voltage to control cooling. High voltage will destroy compressors, and low voltage might cause it to operate inefficiently or not cool at all. 2. Washing Machines Voltage drops can interfere with the motor cycles, leading to inefficient washing or even drum damage. Surges will fry the control board. 3. Ovens & Microwaves Cooking devices possess heating components that are sensitive to voltage surges. They will overheat or simply fail if the voltage is not stable. 4. Air Conditioners Air conditioners are very sensitive. Compressors get affected by low voltage and can cause frequent shutdowns, drastically reducing lifespan. 5. Smart Devices & TVs Smart devices incorporate circuit boards and chips that are extremely sensitive to voltage fluctuations. A single surge will damage their inner system. Signs That Voltage is Damaging Your Appliances Identifying signs early will help you avoid spending thousands on repairs or replacements. Watch out for: Recurrent appliance failures Flickering lights or dimming when appliances begin operating Strange humming or buzzing noises Burning odors or hot outlets Random shutdown of appliances Breakers tripping without obvious cause These are warning signs that the voltage effect on appliances is already at work in your home. Common Causes of Voltage Problems in Homes Knowing the source of voltage instability allows you to take corrective measures. Faulty Home Wiring: Deteriorated or loose wiring can lead to repeated dips or surges. Overloaded Circuits: Connecting too many appliances to a single circuit draws too much power. Storms & Lightning Strikes: One of the more common external sources of electrical surges. Grid Fluctuations: Utility companies could have unstable supply during peak times. Large Appliance Startups: Start up of refrigerators or air conditioners can lead to temporary voltage drops. How to Protect Your Appliances from Voltage Damage Prevention is better than a costly repair. Here’s how to safeguard against the voltage effect on appliances: 1. Use Voltage Stabilizers These automatically regulate power supply and keep voltage within safe limits. 2. Install Whole House Surge Protectors Installed at your main electrical panel, these protect all appliances from sudden surges. 3. Use Uninterruptible Power Supply (UPS) Perfect for computers, modems, and smart devices. A UPS provides backup time and voltage regulation. 4. Smart Plugs with Surge Protection New smart plugs not only safeguard devices but also monitor voltage trends and energy consumption. 5. Get a Home Electrical Audit An electrician can identify wiring problems, old breakers, or low voltage circuits. Advanced Technology Battling Voltage Unsteadiness (2025 Trends) Appliance makers in 2025 are including smarter protection technologies, such as: Voltage Auto Cut Systems: Automatically switch off when voltage is hazardous. Smart Diagnostics: Alerts the app when there’s abnormal voltage. Embedded Surge Protection: Installed in high end appliances. However, appliance features alone are not sufficient you require protection at the household level. Voltage Fluctuation & Energy Bills: What’s the Connection? Unstable voltage not only ruins your equipment it also increases your electricity consumption. Motors labor, cooling cycles prolong, and heating elements work harder, raising your bill. Routine voltage dips can make some appliances take longer to operate, therefore using more power without even enhancing performance. Best Practices for Appliance Protection in Victoria, BC Residing in Victoria, BC, where power fluctuations and changes in weather might be more prevalent, it’s even more important to tackle the voltage effect on appliances. Looking for professional advice? Visit our guide on protecting appliances with smart placement strategies to reduce risk even further. Expert Tips to Extend Appliance Lifespan Unplug appliances always during storms. Don’t use extension cords for heavy appliances. Don’t overload sockets. Keep your house wiring current. Arrange with an electrician to maintain regularly. Final Thoughts If you’re operating a technologically advanced smart kitchen or minimal home arrangement, the voltage effect on appliances is a very real danger that you shouldn’t take lightly. Voltage issues can creep up quietly or hit like lightning in either case, the outcome can be frustrating and costly.To learn more about how voltage fluctuations can harm your devices, explore this expert guide on the voltage effect on appliances and how to stay protected. Protecting appliances is protecting lifestyle and long term investment. With the appropriate measures, tools, and knowledge, you can minimize the voltage effect on appliances and prolong their lifespan securely in 2025. FAQs: Voltage Effect on Appliances Q1. Can voltage fluctuations cause irreversible damage to appliances? Yes, constant fluctuations can lead to permanent damage to motors, circuit boards, and other internal components. Q2. Is a stabilizer required for every appliance? No, but it is advisable for high-end and delicate appliances such as refrigerators, ACs, and smart TVs. Q3. How can I determine if my home has voltage issues? Indications include flickering
Ultimate Smelly Fridge Fix Guide: Say Goodbye to Odors

Smelly Fridge Fix Tips Every Homeowner Should Know There’s nothing worse than opening your refrigerator and being hit with a wave of unpleasant odor. A smelly fridge isn’t just annoying it can also be a sign of deeper issues that need immediate attention. Whether it’s spoiled food, hidden spills, or neglected cleaning, the good news is: there’s always a solution. In this guide, we will take you through the best reasons why your fridge smells and offer you a full Smelly Fridge Fix from cleaning tips to prevention that keeps your fridge fresh daily. 1. Common Causes of a Stinky Fridge It is possible for even the cleanest of homes to be affected by fridge odors. Some of the most common causes are: Expired or Spoiled Food: Leftover foods that are forgotten and expired milk can easily rot and create awful smells. Spills and Leaks: Juice, meat drippings, or sauce can leak into shelves or drawers and become a breeding ground for bacteria. Mold or Mildew: Dampness from open containers or vegetables can cause mold within concealed corners. Poor Air Circulation: If your fridge is packed too tightly, air does not circulate effectively causing warm spots and build up of odors. Dirty Drip Pan: Too many people don’t remember to look at the drip pan below their fridge. If it’s dirty, it can smell awful. Clogged or Dirty Filters (on some models): Similar to your AC, some fridges have filters that may become clogged with time. 2. Smelly Fridge Fix: Step by Step Deep Cleaning Here’s how to eliminate the stench and make your fridge smell fresh again: Step 1: Empty the Fridge Completely Remove all food items. Toss anything expired, spoiled, or suspicious. Don’t forget to check condiments and jars. Step 2: Remove Shelves & Drawers Take out all removable parts and soak them in warm water with mild dish soap. For deep set grime, use a mix of baking soda and vinegar. Step 3: Clean the Interior Use a homemade cleaner (2 tbsp baking soda + 1 cup water) or white vinegar spray. Clean every surface: walls, ceiling, door gaskets, and corners. Step 4: Don’t Forget the Drip Pan Find your fridge’s drip pan and clean it well. This is a sneaky cause of stinky odors! Step 5: Dry Everything & Reassemble Allow all pieces to air dry fully before putting them back in. Moisture is a recipe for mold do not seal it in. 3. Natural Deodorizers You Can Use A clean refrigerator is a good start, but having a deodorizer makes it smell fresh longer. Try these: Baking Soda: Put an open box inside. Replace every 3 months. Activated Charcoal: Picks up odors faster than baking soda in some instances. Fresh Coffee Grounds: Eliminates smells and has a nice scent left behind. Cotton Ball with Vanilla or Lemon Extract: Provides a light scent naturally. 4. Preventing Future Fridge Odors Keeping odors out is equally essential as eliminating them. Here’s how: Label & Date Your Food: Ensures you know what to use and when to discard. Use Airtight Containers: Stops leaks and traps odors. Clean Spills Immediately: Don’t let them sit and become an issue. Set Reminders to Clean Monthly: Clean shelves and look for expired food. Don’t Overcrowd: Proper air circulation stops hot spots where bacteria can multiply. Keep a Deodorizer Inside: Always have something that absorbs odors. 5. When the Smell Persists: What to Check Occasionally, after a thorough clean, the smell comes back. Here are advanced moves for a stinky fridge repair: Check the Drain Hole: Trapped food and mold can clog here. Clean with a pipe cleaner or turkey baster and warm water. Inspect Door Seals: Defective or moldy gaskets must be cleaned or replaced. Check the Freezer Too: Frozen spills or spoiled meat may be the culprit of odors. Call a Technician: If odor is from wiring or mechanical components, it’s time to call in the pros. 6. Expert Tips from Appliance Repair Pros Professionals suggest the following to keep your fridge odor-free: Clean coils and filters every 6 months. Defrost manually if you see buildup. Monitor with a fridge thermometer to maintain optimal temperature (37–40°F for fridge, 0°F for freezer). Perform annual appliance maintenance. For more practical solutions, explore our expert-backed washing machine repair tips to keep your laundry routine hassle free. 7. Hidden Places That Could Be Causing the Smell Occasionally, the source of the smell isn’t under your nose it lies in areas you hardly ever consider examining. Spaces such as the rubber door seal, beneath crisper drawers, or even at the back of the fridge can harbor food bits or moisture, gradually becoming stinky hotbeds. A real Smelly Fridge Fix involves checking on these secretive problem areas and thoroughly cleaning them. It’s usually the areas you neglect in your routine wipe down that end up being the biggest offenders. External Resource for DIY Enthusiasts Want more hands on guidance? Check out this step by step tutorial on how to fix a smelly fridge with additional visuals and advice. Final Thoughts: Smelly Fridge Fix A Smelly Fridge Fix doesn’t have to be difficult. With the proper routine and speedy response, you can neutralize odors and get your fridge fresher than your food. Whether deep cleaning or merely swapping out a box of baking soda, each step counts. Investing time today means less trouble (and odors!) tomorrow. For homeowners in Victoria BC, maintaining clean and serviced appliances guarantees a long lasting performance. Don’t wait for the signs to appear act quickly, and get a fresher, healthier kitchen today with your Smelly Fridge Fix. FAQ: Smelly Fridge Fix Q1. What is the quickest way to repair a stinky fridge? The fastest Smelly Fridge Fix is to take all food out, wash all shelves using baking soda and hot water, and put an open box of baking soda or activated charcoal in the fridge to soak up smells. Q2. Why does my fridge continue to smell despite cleaning it? Even after
Expert Washing Machine Repair Tips to Make Life Easier
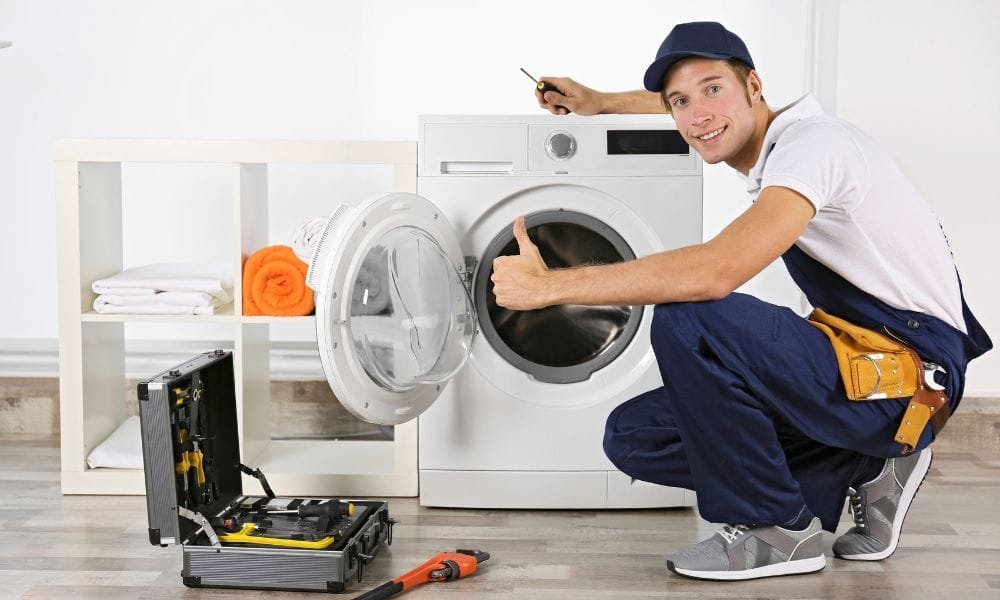
Washing Machine Repair Tips: Your Ultimate Guide to Fix Common Issues at Home In today’s world, nobody has time or patience for a malfunctioning washing machine. Whether it is dirty laundry accumulating or surprise leaks destroying your floor, washer problems can be both worrying and expensive. But is it possible that you could fix most of these problems on your own, without calling in a repairman right away? That’s where this in depth guide is needed. Whether your spin cycle is noisy, your drum won’t budge, or you get weird leaks under your washer, our Washing Machine Repair Tips is here to assist you. This blog is written for homeowners who would like to regain control over their appliance issues and discover simple yet effective repairs at home. Not only will you be saving on repair costs, but you’ll be prolonging the life of your machine and perhaps even impressing a couple of people with your handiness. Let’s get into the realm of wiser, do it yourself appliance maintenance and learn the repair secrets every homeowner should be aware of in 2025. Why Knowing Washing Machine Repair Tips is Important Save money on costly technician calls Avoid water damage or mold growth Prolong the life of your washing machine Feel more confident in tackling home maintenance jobs Safety First: What to Do Before You Start Before picking up your tools, take these basic safety precautions: Turn off the washing machine to avoid electrical shock Cut off water supply to prevent flooding Wear gloves and ensure your hands are dry Keep your tools within reach Consult your washer’s user guide 7 Everyday Washing Machine Issues and How to Resolve Them 1. Washing Machine Won’t Turn On Check if the outlet is functional Check the power cord for damage Check your home’s circuit breaker Test another wall outlet 2. Water Not Filling Up Check the water inlet valve Inspect hoses for twists or blockages Make sure the water supply is on Check water pressure settings 3. Drum Not Spinning Re distribute the load for improved balance Check and replace the drive belt if damaged Check the motor coupling for damage Check for control board problems 4. Unusual Noises During Wash Cycle Take coins or items out of the drum Check shock absorbers and bearings Verify loose components or drum misalignment 5. Leaking Water Tighten hose connections Check door gasket for tears or dirt Clean drain filter Replace worn seals 6. Washer Not Draining Clean or replace drain pump filter Clear clogged drain hose Check pump motor for malfunction Check the lid switch 7. Bad Smell From Drum Leave door open after washing Run hot cycle with vinegar every month Employ baking soda as a natural deodorizer Utilize washing machine cleaner tablets Looking for more expert guidance? Don’t miss our complete microwave repair tips to fix common issues quickly and safely. When to Hire a Professional to Fix the Washing Machine Most are DIY reparable, but call a pro if: There is an electrical odor or sparks Error codes remain even after resets Internal components such as motors or PCB boards are involved Hidden leaks and difficult to track leaks Preventive Maintenance Tips to Prevent Repairs Regular care can keep your washer in top shape: Run a cleaning cycle once a month Wipe down the rubber gasket after use Avoid overloading the washer Use the right type and amount of detergent Check and clean the lint filter regularly Top Tools You’ll Need for DIY Washing Machine Repair Stock your toolbox with: Screwdrivers (Phillips and flathead) Wrenches and pliers Multimeter for electrical checks Flashlight Towels and a small bucket for water spills Why DIY Washing Machine Repair Is Growing in 2025 Due to improved access to online tutorials and inexpensive tools, homeowners are now more likely to be fixing their own appliance issues particularly washing machine issues. Not only does DIY repair not just give you empowerment, but also a better understanding of how your appliance operates. Whether it’s replacing a drain hose or unjamming a stuck filter, these easy Washing Machine Repair Tips can prevent costly service visits and minimize downtime. In a world where savings and convenience reign supreme, knowing a few clever repair tricks can make all the difference in the ease of operation of your home.For additional expert approved washing machine repair tips, check out this detailed guide from Gulf Coast Appliances. FAQs About Washing Machine Repair Tips Q: Can I fix a washing machine myself? A: Yes most small problems such as clogs or drum imbalance are minor repairs with the proper washing machine repair tips. Q: How frequently should I clean my washing machine? A: If possible, every month with hot water and vinegar or commercial cleaning products. Q: Are top loaders simpler to repair than front-loaders? A: Usually yes top loaders are more accessible and easier to diagnose. Final Thoughts Washing Machine Repair Tips Maintaining your washing machine doesn’t have to be intimidating. With the proper washing machine repair tips, you can fix most frequent problems at home in a quick and safe manner. Having a washing machine is not just a matter of convenience, it is also about efficiency, cleanliness, and maintaining your daily life in perfect condition. But as with any appliance, your washer sometimes requires some TLC to function at its best. With the proper care and a few handy washing machine repair tips, you can tackle anything from a small leak to drainage problems and even an unbalanced drum. Whether you’re repairing a little issue today or learning how not to have a larger one tomorrow, each repair you make brings you closer to being a capable, confident homeowner. So when your washer gets in your way next time, remember you’ve got this. Keep in mind that being proactive with maintenance is the key to preventing expensive repairs. These washing machine repair tips are your first step towards a hassle free laundry day.
Top Microwave Repair Tips to Fix Common Issues Easily

Microwave Repair Tips: What You Can Fix and When to Call a Pro In today’s busy world, the microwave is no longer an amenity it’s a necessity. From warming leftovers to brewing a fast cup of tea, it’s one of the most used appliances in the kitchen. But even with regular use, microwaves do encounter problems. The good news? Not all troubles require an expensive replacement. With proper guidance and some clever microwave repair tips, you can troubleshoot many problems yourself and understand when it’s time to hire a pro. In this in depth guide, we’ll take you through from simple maintenance to basic repair solutions, safety tips, and expert insights to assist you in keeping your microwave working perfectly.Discover practical microwave repair tips to handle common issues like unresponsive buttons, sparking, or heating problems at home. Why Your Microwave Matters Microwaves are convenient, quick, and energy saving. But because we use them every day, they tend to get a lot of wear and tear. Eventually, even the best microwave can have issues such as: Not cooking food well Producing unusual noises Unresponsive controls Door not closing or sealing Instead of rushing out to buy a new one, learning some microwave repair tips can save money, time, and stress. Common Microwave Problems and DIY Fixes Before you call a technician or panic, a few microwave problems have easy solutions. Let’s look at the most frequent problems and what you can do at home. 1. Microwave Failing to Heat Possible Cause: Magnetron failure, faulty door switch, or capacitor problem. DIY Tip: Verify if the microwave operates but does not heat. This typically indicates a broken magnetron. Replacing a magnetron is often complicated and costly, but before assuming the worst: Try reheating something in a microwave-safe bowl for 1-2 minutes. If there is no heat, it’s time to inspect the door switch a misaligned latch can stop the microwave from working. If these don’t fix it, call in a pro—magnetrons have high-voltage parts. 2. Microwave Buttons Not Responding Possible Cause: Worn-out membrane switch or control panel failure. DIY Tip: Unplug the microwave. Open the control panel and scrub under the buttons with a soft cloth and rubbing alcohol. If the keypad is damaged or worn, you might have to replace the touchpad membrane—kits can be bought online and are relatively inexpensive. 3. Microwave Light Not Working Possible Cause: Burned-out bulb. DIY Tip: This is one of the simplest repairs. Just unplug the microwave, remove the panel containing the bulb (usually on the side or top), and replace it with a new microwave-compatible light bulb. 4. Sparking or Arcing Inside Possible Cause: Metal in the microwave, destroyed waveguide cover, or broken rack support. DIY Tip: Don’t ever use metal or aluminum foil in there. Look at the waveguide cover (the plastic looking thing on the side of the microwave). If it’s broken or burnt up, replace it it won’t cost much. Wipe out any grease or food splatters that may be sparking. 5. Microwave Turntable Not Spinning Possible Cause: Bad motor or aligned roller guide. DIY Tip: Take out the glass tray and look at the roller guide below it. Put it back in its correct position. When the motor is broken, you can purchase a new turntable motor online and install it yourself using a screwdriver. These expert backed microwave repair tips can extend your appliance’s lifespan and improve its daily performance. Safety First: What You Should Never Do Yourself Microwaves retain a high-voltage charge even when they’re unplugged. That makes some repairs hazardous. Here’s what to never try without proper training: Replacing the magnetron Repairing the capacitor Working on internal fuses or circuit boards For these problems, it’s always advisable to ring in a professional microwave repair service. Preventive Microwave Maintenance Tips Prevention is always better than cure. Attempt these habits to increase the lifespan of your microwave: Clean Regularly Clean the interior after each use. Food splatters may result in arcing and odor buildup. Use Microwave Safe Containers Steer clear of metals, foil, and certain plastics. They melt or spark. Close the Door Gently Slamming the door may also bend the door switch or misalign it—causing heating problems. Don’t Run Empty Running the microwave empty can be destructive to the magnetron. When to Call a Professional for Microwave Repair Even with the best microwave repair tips, there are some issues that need a professional touch. Call a repair professional if: Your microwave keeps breaking off in the middle of a cycle You notice buzzing or humming noises There is a burning odor Internal components are visibly broken The control panel flickers or goes dead altogether Microwave Repair Prices: What to Expect in 2025 Fixing a microwave can be cheap especially in comparison to replacing an integrated unit. Here’s the quick rundown: When your microwave is more than 10 years old, or repair prices reach 50% of a replacement model, it’s time to replace. Smart Microwaves in 2025: Do They Make Replacing Easier? Smart Wi-Fi microwaves with voice command and AI cooking modes are popular in 2025. Are they simpler to fix, though? Advantages: Integrated diagnostics make problem determination easier. A few apps provide maintenance alerts or fault descriptions. Disadvantages: Smart parts (such as control boards) are expensive to replace. Fixes might demand proprietary tools or manufacturer-specific technicians. Advice: Opt for firms with good customer service and simple part sourcing. These expert microwave repair tips can help you fix common issues at home and extend the life of your appliance with ease. Environmental Benefits of Repairing Over Replacing Microwave fix isn’t only saving money it’s the greener option. In 2025, being sustainable is more important than ever. Fixing: Sends less to the landfill Saves material and energy used to produce Reduces carbon footprint Repair, when practicable, is the green solution ahead. Master these microwave repair tips to troubleshoot faults safely and keep your kitchen running without costly interruptions. Victoria BC Residents: Where to Get Expert Assistance If you happen to
Top Energy Efficient Ovens for 2025 | Smart Kitchen Guide
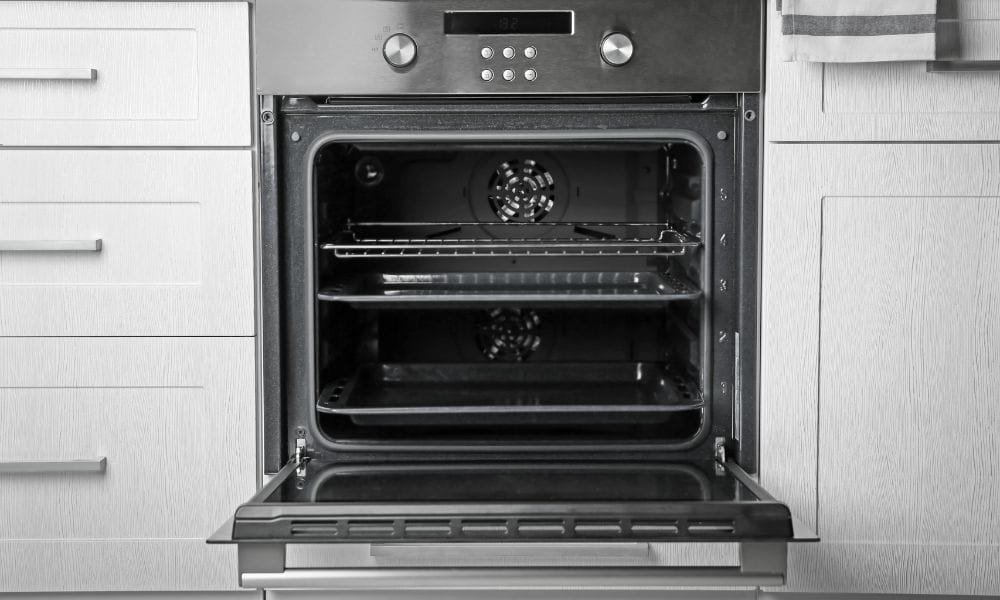
The Ultimate Guide to Energy Efficient Ovens in 2025 In the fast paced world of 2025, home appliances are evolving not just for performance but for sustainability. One standout innovation? Energy efficient ovens. These modern marvels aren’t just about baking or roasting they’re smart, eco conscious, and designed to save you money while reducing your carbon footprint. Whether you are in the process of redoing your kitchen or simply require a more intelligent cooking partner, this complete guide will take you through all that there is to know regarding energy efficient ovens features and advantages as well as expert advice on finding the right one for you. Why Energy Efficiency in Ovens Matters More Than Ever By 2025, the world has made kitchens eco-warzones. Cooking appliances consume the largest part of a home’s energy, and ovens use the most. This is why energy-efficient ovens are making headlines as an essential item in today’s homes. Top Advantages: Reduced Utility Bills: Save as much as 30% on annual energy bills. Green Living: Cut CO₂ emissions per meal. Improved Cooking Control: Accuracy features reduce waste and excess use. Improved for the Planet: Reduced energy consumption = less fossil fuel burned. What Does an Oven “Energy Efficient”? Not all ovens are the same. To be considered energy efficient, an oven will have to perform at or above certain standards usually marked with labels like ENERGY STAR®. But beyond labels, these are the key factors that impact efficiency: 1. Insulation Technology Improved insulation helps avoid loss of heat, thus the oven reaches temperature quicker and holds temperature for longer. 2. Convection Cooking With this feature, fans are utilized to move hot air around, hence even cooking at lower temperatures. 3. Smart Temperature Sensors These are pre-installed sensors in contemporary ovens that regulate heat automatically to maximize the use of energy. 4. Self-Cleaning Cycles Though they use energy in the short run, self clean ovens tend to be better insulated hence more efficient in the long run. Top Energy Efficient Oven Models in 2025 Let’s see the top models of ovens that have energy saving in consideration. A. Convection Ovens They employ a fan to spread heat uniformly, cutting down cooking time and temperature requirements. B. Wall-Mounted Ovens Space efficient and usually electric, they fit in seamlessly with contemporary smart kitchens. C. Smart Ovens Wi-Fi enabled, app-based, and AI-driven. They balance temperature adjustments for optimal energy consumption. D. Steam Ovens They heat food quicker and at lower temperatures, perfect for energy efficiency and wholesome meals. Top Brands for Energy Efficient Ovens in 2025 The following are some reliable names that are pushing the boundaries of energy-efficient ovens: 1. Bosch Famous for German precision and efficiency. Models include EcoChef and AutoPilot modes. 2. Samsung Wi-Fi-connected ovens that provide remote control and energy reports. Dual Cook features for efficient cooking of multiple meals. 3. Whirlpool Features low-energy convection cooking and steam capabilities. 4. Miele High-end ovens with smart energy modes and self-cleaning features. How to Select the Most Suitable Energy Efficient Oven for Your Household Prior to purchasing, keep the following in mind to get the most efficient oven suited for your requirements: Measure Your Space Ventilation space and depth don’t be forgotten when calculating for built-ins. Check for ENERGY STAR® Certification This is your strongest guarantee of true energy savings. Compare Features Seek out intelligent features, double cooking zones, and convection technology. Read Real World Reviews Discover from other people’s experiences on long-term efficiency and performance. Real-Life Example: A Family’s Energy Efficient Oven Upgrade The Robinsons are a family of five who upgraded their aging electric oven to a convection smart oven from Samsung. After one year: Their energy bill fell by 22%. Cooking time decreased by an average of 15 minutes per meal. They now use the oven’s app to track cooking remotely saving time and stress. Maintenance Tips for Keeping Your Oven Energy Efficient To maintain your oven in top working order: Clean it regularly to avoid residue build-up. Use the right cookware glass and ceramic retain heat more efficiently. Avoid preheating unless absolutely needed. Check door seals to avoid heat loss. The Role of Smart Technology in Energy Efficient Cooking New ovens are equipped with features such as: AI cooking suggestions Voice control (Alexa, Google Assistant) Energy monitoring dashboards Remote preheating Smart tech isn’t a luxury it’s an investment in a greener, cost-savings kitchen. The Environmental Impact of Switching to an Energy Efficient Oven Let’s discuss real numbers. If all North American households replaced their existing oven with an energy efficient one, we could: Save more than 3 billion kWh per year. Cut greenhouse gas emissions equivalent to removing 500,000 cars from the road. Avoid millions in wasted utility bills. That’s the magic of intelligent appliance selection. Popular Myths Concerning Energy Efficient Ovens Let’s debunk a few myths: Myth 1: They’re less powerful. Reality: Convection and steam ovens tend to cook quicker. Myth 2: Too pricey. Reality: Savings in the long run balance out initial investments. Myth 3: Difficult to operate. Reality: Most are easy to use and even come with smart assistance. Conclusion: Energy Efficient Ovens Energy efficient ovens are more than green hype they’re an influential move toward smarter, cleaner, and more cost effective living. Whether you care about sustainability or just need to trim monthly bills, going energy efficient with an oven is a smart choice in 2025.So the next time you’re prepared to bake or broil, ensure your oven is working for the planet not against it.For a wider selection of cutting-edge energy efficient ovens, explore trusted options and compare features to find your perfect fit. Discover smart ways to maximize your freezer space in our in-depth freezer storage guide tailored for every modern kitchen in 2025. FAQs about Energy Efficient Ovens Q1: Are energy efficient ovens worth the investment? A1: Yes, they use less electricity, insulate better, and last longer resulting in cost savings over the long term. Q2: Which is the most energy efficient oven type? A2:
Freezer Storage Guide: Smart & Efficient Tips for 2025
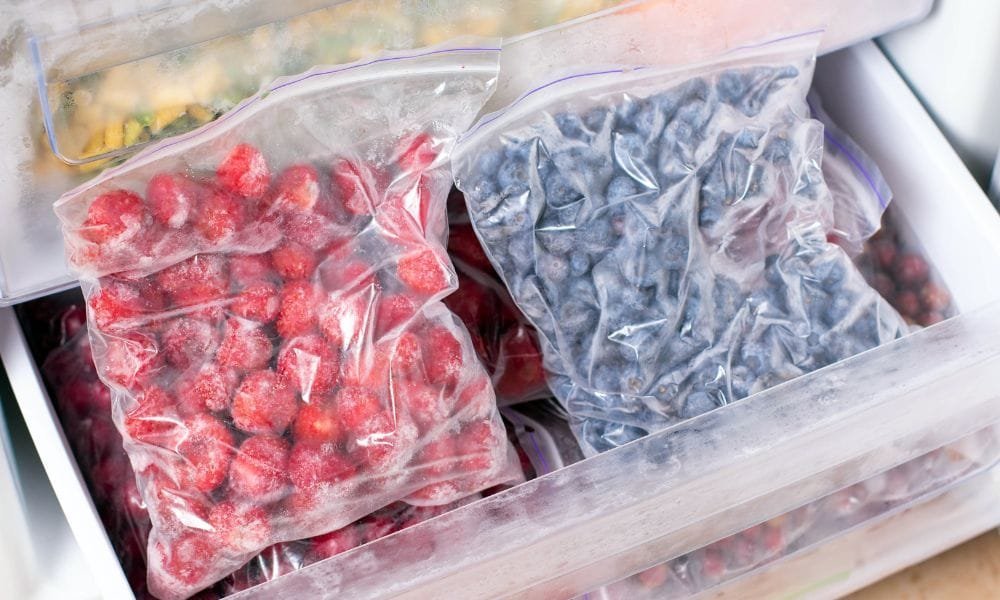
A neat and tidy freezer is not only about presentation it’s about saving money, time, and food. Whether you’re a meal prep aficionado or a Saturday grocery soldier, a freezer storage guide can totally revolutionize the way you store, locate, and keep your food. In 2025, with increasing food prices and expanding household needs, freezer storage optimization isn’t a choice it’s necessary. This manual will guide you through useful, realistic techniques to transform your freezer into a more efficient, energy saving, and worry free appliance. Why Organization in the Freezer Is Important Consider your freezer to be a vault. In it, your frozen foods have an expiration date, and disorganization can result in lost contents, wasted food, and excessive purchasing. This Freezer Storage Guide manual assists: Extend shelf life Prevent freezer burn Improve energy efficiency Cut grocery expenses Save prep and cooking time Step 1: Know Your Freezer Type Before organizing, understand your freezer’s layout: 1. Upright Freezers Resemble refrigerators Easy access with shelves and bins Great for categorized storage 2. Chest Freezers More capacity Ideal for long-term storage Needs more effort for access and organization 3. Drawer Freezers (Bottom-freezer refrigerators) Limited space Best for small households or daily use Needs frequent clean-outs Choose strategies based on your freezer type for best results. Step 2: Declutter First Clear out your freezer and sort through what’s in there. Discard anything with: Expired dates Evidence of freezer burn Ice crystals or smell changes Opened packages with illegible labels After clearing, quickly wipe down your freezer using a baking soda and warm water solution. Step 3: Smart Storage Basics Following are freezer organizing rules that never fail: Label Everything Label using freezer-safe labels or a marker and add name + date. Use Clear Bins Clear bins allow you to easily see what you have. Organize by Food Group Individual bins for meats, vegetables, ready-to-eat meals, fruits, desserts, etc. Freeze Flat Utilize zip-top bags and freeze food flat to conserve space. Step 4: Portion and Prep Like a Pro Storing food in useful portions saves time and prevents waste. Freeze soup or sauce in 1 2 cup increments Slice meat or fruit prior to freezing Separate snacks or school lunches into grab-n-go bags Use this freezer storage tip to make preparation and cooking a lot easier later. Step 5: FIFO First In First Out Stack newer items behind the older ones. It’s the food rotation golden rule and avoids wastage. Store older meals and leftovers in the front Always check before purchasing new frozen food Step 6: Use Vertical Space Stack containers or use magazine holders to hold bags upright. Utilize shelf risers for additional levels Purchase freezer safe stackable containers Use wire baskets to corral smaller items This guide to storing in your freezer leaves no space unused. Step 7: Understand What NOT to Freeze Not all things belong in the freezer. Don’t freeze: Shell eggs High moisture vegetables like lettuce Fried foods (they become soggy) Mayonnaise or creamy sauces Always check if it is suitable for freezing before stocking up. Step 8: Take an Inventory List Stick a checklist to your freezer or use a computer app. Note: What’s inside Date frozen Quantity left Update every week to prevent surprises and cut overbuying. Step 9: Organizing Freezer Zones Split your freezer into ‘zones’: Zone Use Top Shelf Ready-to-eat foods such as frozen dinners Middle Shelf Proteins: chicken, fish, beef Bottom Shelf Heavier foods: veggies, bulk bags Door Ice packs, butter, frozen herbs Step 10: Seasonal Change Seasonally update your freezer. Summer: additional frozen fruits, smoothies, BBQ meat Winter: soups, casseroles, stews Holiday: prepared meals, desserts, special treats Adjusting your freezer storage guide by season keeps it current and practical. Bonus: Freezer Hacks 2025 Use silicone muffin trays to freeze individual servings Vacuum seal items to double shelf life Freeze water bottles to occupy unused space (helps control temp) Label cooking instructions straight on containers For detailed storage timelines and safety, check out this official freezer storage guide from FoodSafety.gov. Sustainability Tip: Ditch Plastic Waste Utilize sustainable storage such as: Silicone bags Glass containers Compostable wax wraps This new freezer storage guide promotes a greener kitchen as well. Final Thoughts Freezer Storage Guide A smart, effective freezer doesn’t just come by chance it’s a product of regular habits, proper tools, and a pinch of planning. This Freezer Storage Guide reduces waste, saves bills, and simplifies life in the kitchen. So go ahead and open that freezer door with assurance.Explore expert appliance placement tips to ensure your freezer performs efficiently and stays organized. FAQs Freezer Storage Guide Q1. How long can meat be stored in the freezer? Up to 6 12 months, depending on cut and packaging procedure. Q2. What’s the ideal container for freezer storage? Use airtight, freezer safe containers or silicone bags to avoid freezer burn. Q3. Is it safe to refreeze thawed food? Only if it was thawed in the refrigerator and hasn’t been out all day. Q4. How frequently should I clean my freezer? At least every 3 months or when you switch out food seasonally. Q5. Does stocking the freezer really save money? Yes, structured freezers minimize wastage of food and prevent unnecessary repeat buys
Discover Essential Modern Refrigerator Features for 2025
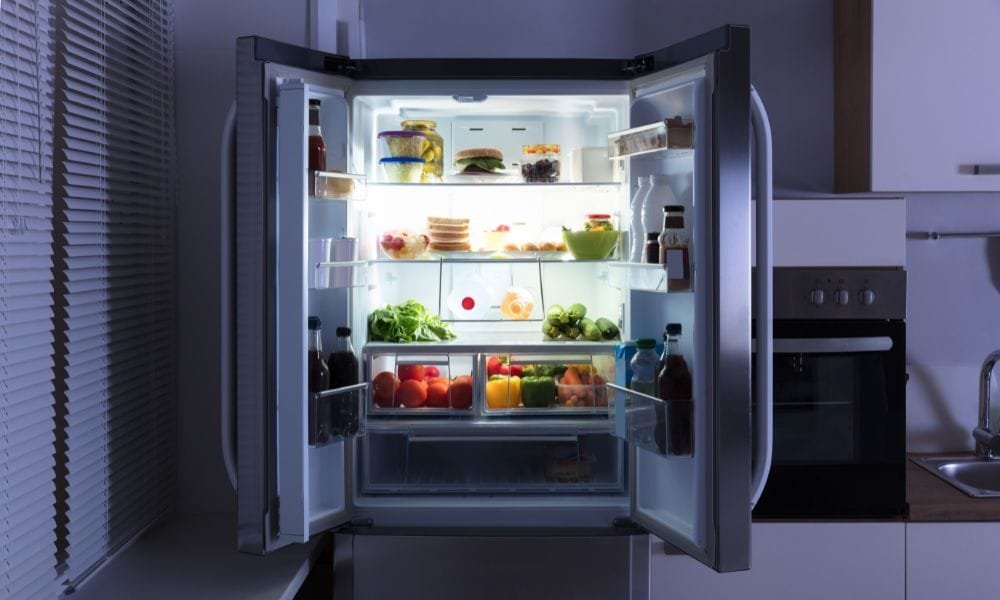
Top Modern Refrigerator Features You Shouldn’t Miss in 2025 In 2025, refrigerators no longer just store food they’re smarter, greener, and engineered to enrich your lifestyle. The Modern Refrigerator Features of today address everything from remote monitoring to controlling food freshness. If you’re considering an upgrade, this guide reveals all the shocking innovations you didn’t know you need in a refrigerator. Why Modern Refrigerator Features Matter Advanced refrigerator features aren’t mere bells and whistles they have direct practical effects on your daily routine. From making food last longer to assisting you in cutting down on energy costs, these features can save time, money, and effort. They also sync with the increasing trend for smart homes, eco-friendliness, and a connected way of living. The ideal 2025 refrigerator must provide an optimal blend of convenience, savvy features, and endurance. 1. Smart Temperature Zones Old school refrigerators have one temperature setting for all compartments. The newer designs, however, have adjustable temperature zones. These enable you to keep veggies, meat, and drinks at their perfect temperatures keeping them fresher and minimizing waste. Smart zones are ideal for households that have a large number of different items stocked at any given time. 2. AI Driven Food Management Refrigerators now include AI systems that track your food inventory. Some models scan barcodes or use interior cameras to monitor what’s inside. They can notify you when items are about to expire, suggest recipes based on available ingredients, and even add missing items to your grocery list. This is one of the most convenient Modern Refrigerator Features for busy lifestyles. 3. Built in Water Purification & Ice Tech Forget after market filters. Modern refrigerators include sophisticated water purification systems and dual ice makers which make cubed and crushed ice. Even some premium models include nugget ice, for that chewable, soft texture ideal for cocktails or children’s beverages. Effortless clean hydration and entertaining. 4. Touchscreen & Voice Assistant Integration Touchscreen control panels now serve as entertainment centers, recipe locators, and grocery planners. With voice assistants such as Alexa or Google Assistant integrated in, your refrigerator is a wise kitchen command center. You can look up the weather, listen to music, or switch on other smart home devices all from the fridge door. 5. Energy Efficiency and Sustainability ENERGY STAR ratings are only the beginning. In 2025, numerous models employ environmentally friendly refrigerants, upgraded insulation, and inverter compressors to save lots of energy. Smart sensors track usage habits and maintain cooling automatically. These Modern Refrigerator Features reduce bills and your carbon footprint. If you’re tired of strange appliance sounds, check out our detailed guide on dryer noise issues to pinpoint and fix the problem fast. 6. Convertible Compartments A favorite feature, convertible compartments enable you to flip a section between fridge and freezer use. Whether you have party trays, additional beverages, or frozen items to store, the flexibility is perfect. It’s having an additional fridge or freezer that adapts to your lifestyle. 7. UV C Sanitization Technology Hygiene is key in 2025. That’s why UV-C light sanitizing integrated into new refrigerators is a game changer. This technology destroys bacteria and mold on interior surfaces and keeps your food fresher, longer perfect for health conscious families. 8. Interior Cameras & Remote Monitoring With in door cameras built in, you can see what’s in your fridge through a smartphone app wherever you are. Did you remember whether you had milk when you were going shopping? Simply take a look at your app. This is one of the most valued new fridge features among tech conscious homeowners. 9. Door in Door & Auto Open Features Door in door configurations provide instant access to commonplace items such as beverages or sauces without having to open the whole fridge. Others provide auto open doors that swing open when they detect movement great when carrying a bunch of groceries in your hands. 10. Sleek Designs & Personalized Finishes Form and function in 2025. Select from stainless steel, matte black, glass finishes, or custom panels. Most contemporary refrigerators also incorporate flush installation and hidden handles to seamlessly integrate within open floor plan kitchens. 11. Smart Alerts & Diagnostics No more uncertainty about whether your fridge is broken. With integrated diagnostics and app alerts, newer refrigerators alert you when the door is ajar, filters are due for replacement, or maintenance is required. A few even assist you in scheduling the repairs on your own. 12. Wi-Fi & App Control Wi-Fi enables far off access via apps, where you can make temperature adjustments, track energy consumption, or get maintenance notices. App control is now an standard element for new models of refrigerators particularly in smart homes. 13. Built in Beverage Centers Some high end refrigerators even come with specialized beverage centers, complete with customizable shelves, rapid chill compartments, and even wine racks. If you are someone who entertains frequently or likes having drinks served exactly at the right temperature, this is the feature for you. 14. Auto Defrost and Adaptive Cooling Manual defrosting is a thing of the past. New models offer auto defrost with adaptive cooling systems that learn your usage patterns. These technologies ensure even cooling and prevent ice build-up saving you maintenance hassles. 15. Modular Storage Solutions Rotating, pull-out, and adjustable shelves are standard in 2025 refrigerators. These modular shelves make it easy to accommodate tall bottles, bulky containers, or fragile items. Consider models with spill proof shelves as well as customizable drawer dividers for enhanced convenience. Selecting the Best Refrigerator for Your Needs In shopping, do not just consider size and cost. Ask yourself: Would you like smart home integration? Do you require additional freezer or fridge capacity? Are looks a concern for you? Is saving energy a concern? Search for sleek refrigerator features that suit your family’s requirements. For tech enthusiasts, opt for touchscreen and AI control. For big families, convertible zones and modular storage are best. And for environment-friendly users, ENERGY STAR and inverter compressors are essential. Final Thoughts Modern Refrigerator Features